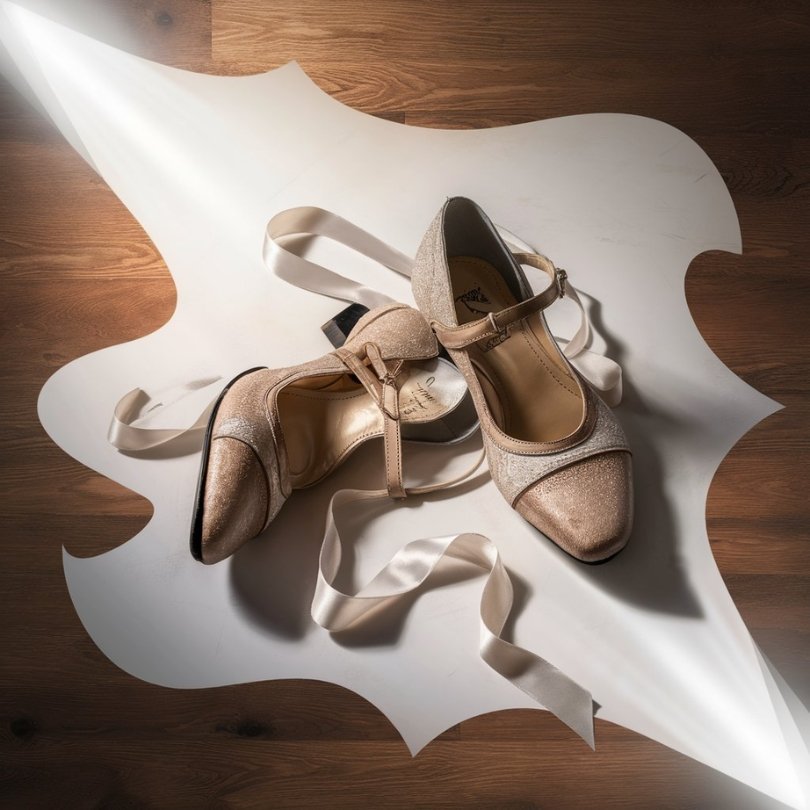
How to Break in Your New Ballroom Dance Shoes
Quick Answer
To break in your new ballroom dance shoes, start by wearing them around the house for short periods. Gradually increase the wear time and practice some dance steps to help the shoes mold to your feet.
But what specific exercises can expedite this process? Here are effective techniques to make your break-in period smoother and more efficient.
- Toe Flexing: Sit down and flex your toes up and down to loosen the shoe material around the toe box.
- Foot Rolling: Use a tennis ball to roll under your foot. This helps mold the shoe to your foot shape.
- Heel Raises: Stand on a step with your heels off the edge. Raise and lower your heels to stretch the shoe material.
- Walking Drills: Walk on different surfaces like carpet and hardwood to adapt the shoes to various textures.
- Dancing Practice: Start with slow dance moves and gradually increase intensity. Focus on turns and pivots to soften the soles.
By following these steps, you can ensure your ballroom dance shoes become comfortable and performance-ready.
Best Methods to Break in Dance Shoes
To break in your new ballroom dance shoes without causing damage, start by softening rubbing areas with a small amount of alcohol or water. When not in use, stuff the shoes with socks to help maintain their shape.
Apply moleskin or bandages to prevent blisters on your feet. Gradually increase your wear time, ensuring you avoid non-dance floors to protect the soles.
Wet Rubbing Areas with Alcohol or Water
Wetting the areas of your ballroom dance shoes that are prone to rubbing, such as the straps and heels, with rubbing alcohol or water can help soften the material and make them more comfortable. This technique simulates the effect of sweating, which naturally occurs when you dance. By pre-soaking these areas, you allow the material to become more pliable, reducing the risk of blisters and discomfort.
To do this, take a cotton ball or a soft cloth and dampen it with rubbing alcohol or water. Gently rub the dampened cloth over the areas of the shoes that usually cause friction. Be careful not to soak the shoes completely, as too much moisture can damage the material. Once you’ve treated the rubbing areas, wear the shoes around the house for short periods to let them dry and mold to the shape of your feet.
You can repeat this process a few times until the shoes feel more comfortable. This method is particularly effective for leather and synthetic materials, which can be stiff initially but will soften up with a bit of moisture and wear.
Always ensure the shoes are completely dry before storing them to maintain their shape and quality.
Stuff Shoes with Socks When Not in Use
After treating the rubbing areas, another effective method for breaking in your ballroom dance shoes is to stuff them with socks when not in use. This simple trick helps maintain their shape and gently stretches them without causing damage. Choose clean, soft socks and roll them into tight balls. Place these sock balls inside your shoes, ensuring they fill the toe box and any other tight areas. This creates gentle, consistent pressure that gradually expands the material.
Stuffing your shoes with socks also helps absorb moisture from dancing, preventing odors and bacteria buildup. Make it a habit to stuff your shoes after every practice session or performance. This keeps your shoes in the best possible shape and ready for your next dance.
Use Moleskin or Bandages to Prevent Blisters
Protecting your feet from blisters is crucial when breaking in new ballroom dance shoes. You can do this by using moleskin, blister bandages, or lambswool on areas that rub. These materials act as barriers between your skin and the shoe, reducing friction and preventing painful blisters.
First, identify the spots where your new shoes tend to rub. Common areas include the heel, sides of the toes, and the ball of the foot. Once you’ve pinpointed these spots, apply moleskin or blister bandages directly to your skin before putting on your shoes.
Moleskin is particularly effective because it’s thicker than regular bandages and provides extra cushioning. Another option is lambswool, which you can place inside your shoes at pressure points. This natural material cushions your feet and absorbs moisture, keeping your feet dry and less prone to blisters.
Gradually Increase Wear Time
To break in your new ballroom dance shoes without causing damage, start by wearing them for short periods during practice sessions. Begin with just 15 to 20 minutes of dancing. This limited wear time allows your feet to adjust to the new shoes gradually. It also helps the shoes start molding to the shape of your feet without putting too much strain on them.
After each short session, note any discomfort or tight areas. This feedback is crucial for knowing where to focus on stretching or softening the shoes if needed. Gradually increase the wear time by an additional 10 to 15 minutes each session. This step-by-step approach prevents over-stressing both your feet and the shoes, reducing the risk of blisters or strain.
Another effective method is to alternate between your new and old dance shoes. By switching back and forth, you give your feet a break while still allowing the new shoes to form to your feet. This gradual increase in wear time also lets the materials of the shoes, such as leather or satin, soften and become more flexible, ultimately enhancing comfort and performance.
Avoid Non-Dance Floors
To keep your new ballroom dance shoes in good condition, wear them only on proper dance floors. Dance floors provide the right friction and support, which helps maintain your shoes’ integrity.
Wearing them on surfaces like concrete, asphalt, or regular home flooring can damage the soles and cause excessive wear, shortening their lifespan.
To break in your new shoes properly, use them only in dance studios or venues with appropriate flooring. This will keep the soles intact and ensure the shoes function as designed.
Non-dance floors can be uneven or rough, leading to scuff marks or structural damage. Also, improper surfaces can affect your balance and performance, making it harder to get used to your new shoes.
Always choose the right environment for your dance shoes to maximize their longevity and maintain their quality.
Wear Around House with Thick Socks
Slip on a pair of thick socks and wear your new ballroom dance shoes around the house to gently stretch and soften them. Thick socks create a buffer between your feet and the shoes, easing the tightness without causing blisters or discomfort. This method is ideal for gradually stretching the material and making the shoes more comfortable without compromising their structure.
Spend about 30 minutes to an hour each day walking around your home. As you go about your daily activities, the shoes will gradually mold to the shape of your feet, providing a custom fit. Be mindful of any pressure points or areas that feel too tight and adjust as needed. If certain spots remain stubbornly tight, use a shoe stretcher or apply a bit of leather conditioner to those areas for extra flexibility.
Typical Time to Break in Dance Shoes
Breaking in new ballroom dance shoes typically takes 8-10 hours of actual dancing. The exact time can vary depending on the shoe material and how often you wear them. Soft ballroom shoes, usually made from softer leather, generally break in within 1-2 weeks of regular use. Hard ballroom shoes, featuring stiffer leather and heels, can take around 3-4 weeks to fully adapt to your feet.
The break-in process involves the shoes gradually molding to the shape of your feet through body heat, moisture from sweating, and the natural flexing that happens while you dance. Rushing this process can lead to discomfort, blisters, and potential damage to your shoes.
To ensure a smooth break-in period, start by wearing your new shoes for short dance sessions. Gradually increase the duration as the shoes begin to soften and conform to your feet. You can also wear them around the house to get used to the fit without intense movements.
Taking preventative measures can help. Tape problem areas, use blister guards, and pay attention to any discomfort. These steps will make the break-in period more manageable and help avoid excessive blisters and discomfort. This approach ensures that your shoes last longer and provide the best support during your dances.
Exercises for Breaking in Dance Shoes
To break in your ballroom dance shoes more effectively, start with simple foot and ankle exercises. These will build flexibility and make the shoes more comfortable.
Practice your dance steps and choreography regularly to shape the shoes to your movements.
Using roll-through foot positions and percussive movements for hard shoes can also help soften and mold them to your feet.
Walk with Foot/Ankle Exercises
Wearing your new ballroom dance shoes around the house while doing targeted foot and ankle exercises will help them mold to your feet more effectively. Start by walking in them for short periods, gradually increasing the time as your feet adjust. This allows the shoes to soften and become more flexible, making them more comfortable for dancing.
Begin with ankle rolls. Stand with your feet shoulder-width apart and slowly roll your ankles in circular motions. This loosens the shoe material around your ankles.
Next, try pointing and flexing your feet. Sit down, extend one leg, and point your toes as hard as you can, then flex them back towards your shin. Repeat this several times for each foot.
Another effective exercise is toe scrunches. While seated, place a towel on the floor and use your toes to scrunch it up towards you. This engages the muscles in your feet and helps break in the shoe material.
Incorporating these exercises into your routine will speed up the break-in process, ensuring your new ballroom dance shoes fit well when it’s time to dance.
Bar Work Exercises
Incorporating bar work exercises like pliés, tendus, and dégagés into your routine can help break in your ballroom dance shoes. These exercises prepare your feet for dancing and mold your shoes for a better fit.
Start with pliés to warm up your muscles and stretch the shoe material. Perform both demi and grand pliés to engage different parts of your feet and ankles.
Tendus are excellent for working the toe box area. Point your toes and extend your leg forward, to the side, and backward while maintaining contact with the floor. This motion softens the material around your toes, allowing more flexibility.
Dégagés lift your foot off the ground, helping break in the upper part of the shoe. Quick, sharp movements encourage the shoe to adapt to your foot’s shape more quickly.
Go up on relevé frequently. Rising to the balls of your feet helps break in the toe box area, making the shoes less stiff and more comfortable.
Consistent practice of these exercises will make your ballroom dance shoes feel like a second skin.
Practice Dance Steps and Choreography
Start by practicing dance steps and choreography in your new ballroom dance shoes to help break them in effectively. Even if you just mark through the movements initially, the flexing and pivoting motions are crucial.
Begin with basic steps like the box step or chasse, which involve repetitive footwork and gentle pivots. This helps the shoes adapt to the natural movements of your feet.
Next, practice your routine or any choreography you’re working on. You don’t have to dance full out from the start. Moving through the motions at a slower pace can help your shoes become more flexible and comfortable. The more you practice, the quicker your shoes will mold to your feet.
Focus on exercises that involve a lot of foot articulation. Pivots, turns, and simple weight transfers can be very effective. Try incorporating some spins or twirls, as they demand a lot from your shoes in terms of flexibility and support.
Lastly, listen to your body. If you start feeling any discomfort, take a break. Gradual and consistent practice will break in your shoes more effectively than pushing through pain.
Roll Through Foot Positions
Rolling through foot positions, such as transitioning from flat to demi-pointe to full pointe and back down, is an effective way to break in your ballroom dance shoes. This method works the entire shoe, ensuring it molds to your foot’s natural shape and flexibility.
Start by standing flat on the floor. Slowly raise your heels to move into demi-pointe, and hold for a moment. Then, push up to full pointe, engaging your calves and foot muscles. Slowly lower back to demi-pointe, and finally to a flat position.
Repeat this movement several times, focusing on smooth transitions. This exercise helps the shoes conform to your foot and strengthens the muscles you’ll use while dancing. The more you practice rolling through these positions, the faster your shoes will become comfortable and responsive.
You can also perform this exercise while holding onto a barre or a sturdy piece of furniture for balance. Consistency is key, so try incorporating this exercise into your daily routine. By dedicating just a few minutes each day, you’ll make your ballroom shoes more flexible and dance-ready in no time.
Percussive Movements for Hard Shoes
To break in hard ballroom shoes, focus on percussive movements like heel leads, toe drags, and stamps. These methods help loosen the stiffer materials in the shoes.
Start with heel leads. Step forward with your heel first, putting weight on it before transitioning to the ball of your foot. This movement not only breaks in the heel but also flexes the shoe’s arch.
Next, practice toe drags. Stand on one foot and drag the toe of the other foot along the floor. This action softens the toe box and improves flexibility. Repeat this motion several times, alternating feet.
Low-Impact Exercises
Wearing your ballroom dance shoes during low-impact exercises like squats, lunges, or calf raises can help break them in effectively by generating heat and moisture. These exercises allow the shoes to mold to your feet without putting too much strain on the material.
Start with calf raises. Stand with your feet shoulder-width apart, rise onto your toes, and then lower your heels back down. This will stretch the shoes and soften any tight areas.
Next, try lunges. Step forward with one leg and lower your hips until both knees are bent at a 90-degree angle. This exercise breaks in the shoes and strengthens your legs for better dance performance.
Lastly, include squats in your routine. With your feet shoulder-width apart, lower your body as if sitting back into a chair, then return to a standing position. Squats help the shoes flex naturally, making them more comfortable.
Mistakes to Avoid When Breaking in Shoes
When breaking in your new ballroom dance shoes, use blister prevention products and shoe stretchers to avoid discomfort.
Avoid applying rubbing alcohol improperly, as it can damage the material if not used cautiously.
Wear thick socks and do foot stretches, but avoid overdoing it to prevent strain.
Use Blister Prevention Products
To prevent painful blisters while breaking in your new ballroom dance shoes, use blister prevention products correctly. Start by identifying high-friction areas on your feet, such as your heels, toes, and the sides of your feet. Once you’ve located these spots, apply moleskin, gel pads, or lambswool covers. These products create a barrier between your skin and the shoe, reducing friction and the risk of blisters.
Ensure these products are securely in place to prevent them from shifting while you dance. Skipping this step can lead to blisters even if your shoes feel comfortable at first. The repeated motion of dancing can quickly cause blisters without preventative measures.
Check your feet periodically. If you notice any redness or irritation, adjust the blister prevention products. Replace them as needed, as worn-out pads won’t provide the same level of protection.
Use Shoe Stretchers
Many dancers over-stretch their new ballroom dance shoes, leading to an improper fit and reduced support. When using shoe stretchers, be cautious. Don’t rush; gradual stretching is key. Invest in shoe stretchers designed for ballroom or dance shoes, as these offer better control and a more accurate fit.
Start by inserting the shoe stretchers into your shoes and adjust them to a moderate stretch. Leave them in for a few hours, then check the fit. If more stretch is needed, increase the tension slightly and leave them in for another few hours. Repeat until you achieve a comfortable fit.
Avoid leaving the stretchers in too long or setting them to overly high tension from the start. This can cause the material to overstretch and lose its supportive structure. Patience is crucial when breaking in your shoes. Over-stretching can make them too loose, compromising your performance on the dance floor.
Apply Rubbing Alcohol
Before applying rubbing alcohol to your new ballroom dance shoes, focus only on specific areas prone to rubbing, like straps and heels. This method simulates the effects of sweat, helping to soften the materials faster. However, avoid common mistakes to prevent damaging your shoes or making them uncomfortable.
First, don’t soak the entire shoe in rubbing alcohol. Too much can weaken the shoe’s structure. Instead, use a cotton ball or a soft cloth to dab small amounts onto the targeted areas. This gives you more control and prevents over-saturation.
Second, avoid applying rubbing alcohol on delicate embellishments or intricate stitching. These parts of the shoe are often fragile and can be damaged by alcohol.
Another mistake isn’t letting the shoes dry properly before wearing them. Allow the treated areas time to air dry so the material softens without becoming too brittle.
Lastly, don’t rush the process. Apply the rubbing alcohol gradually over a few days rather than all at once. This helps you achieve a more comfortable fit without compromising the integrity of your ballroom dance shoes.
Wear Thick Socks
When breaking in your new ballroom dance shoes, wear thick socks to help stretch and loosen the material. However, avoid wearing them for too long to prevent discomfort. Thick socks can help, but extended use may cause blisters or strain your feet. Stick to short, frequent sessions to let the shoes gradually mold to your feet without causing pain.
Regularly check the fit of your shoes. With thick socks, they might feel snug at first, but as they stretch, the shoes can become too loose. Periodically, take off the thick socks and try the shoes with your regular dance socks to ensure they still fit well. This will help you avoid overstretching and maintain a comfortable fit.
Be mindful of the surfaces you walk on. Thick socks can create excess friction, and rough surfaces could damage the soles or the upper material of your shoes. Practice on clean, smooth floors to protect your shoes while breaking them in.
Following these tips will make the break-in process more effective and comfortable.
Do Foot Stretches
After wearing thick socks to help stretch your new ballroom dance shoes, it’s also important to incorporate foot stretches to ease the break-in process.
Start with basic ankle rolls. Rotate your ankles in both clockwise and counterclockwise directions. This enhances flexibility and reduces stiffness. The exercise generates heat and moisture, making the shoes more pliable.
Next, practice pointing and flexing your feet. Point your toes as far as they can go, then flex them back towards your shins. This stretches your shoes and strengthens the muscles in your feet, which is crucial for balance and control while dancing.
Walking around in your shoes is another effective method. Take short walks around your home, gradually increasing the time you spend in them. This helps the shoes conform to the shape of your feet, making them more comfortable over time.
Avoid common mistakes like skipping these stretches or rushing the process. Hastily breaking in shoes can lead to discomfort and even injury. Be patient and consistent with your foot stretches, and you’ll soon enjoy the perfect fit for all your dance moves.
Warm Shoes with Hairdryer
Warming up your new ballroom dance shoes with a hairdryer on a low setting can make the material more flexible and easier to mold to your feet. Follow these steps to avoid damaging your shoes or causing discomfort.
First, use a low heat setting. High temperatures can damage materials like satin. Stick to low heat to gently warm the shoes.
Second, keep the hairdryer at least 6 inches away from the shoes. This helps distribute the heat evenly and prevents scorching or warping.
Third, limit the warming time to a few minutes. Excessive heat can weaken the adhesive holding the shoes together, leading to structural issues.
Use Gel Inserts
To make breaking in your new ballroom dance shoes more comfortable, start by using gel inserts or heel grips for extra cushioning in tight areas. Gel inserts can help distribute pressure more evenly, reducing the risk of blisters and sore spots. Place them where you feel the most pressure, usually around the ball of the foot, heel, or arch.
When using gel inserts, avoid choosing ones that are too thick. Thick inserts might make your shoes feel too tight, causing additional discomfort. Opt for thin, high-quality gel cushions that offer support without compromising the fit of your shoes.
Ensure the gel inserts adhere well to the inside of your shoes. Loose inserts can shift during dance sessions, causing instability and awkward movements. Properly secured inserts will help you maintain stability on the dance floor.
Periodically check the condition of your inserts. Over time, they can wear out and lose their cushioning effect. Replace them as needed to maintain optimal comfort while breaking in your ballroom dance shoes.
Conclusion
Breaking in your new ballroom dance shoes requires time, patience, and the right techniques. Gradually increase your wear time to avoid blisters and discomfort.
Use moleskin and stuffing to cushion your feet and enhance comfort. Incorporate bar work exercises to soften the shoes and improve flexibility.
Avoid rushing the process or applying excessive force, as this can damage the shoes. By following these tips, you’ll soon be dancing comfortably and confidently.


